MITRE ATT&CK Mapping in Microsoft Sentinel: A Practical Primer
MITRE ATT&CK is the common language of threat detection — but for a lot of SOC teams, it’s a poster on the wall rather than something actively used. This primer shows how to actually use ATT&CK mapping in Sentinel to find coverage gaps and prioritize new detections.
What ATT&CK Mapping Gives You
Every Sentinel analytics rule can be tagged with one or more tactics (the “why” — e.g., Initial Access, Lateral Movement) and techniques (the “how” — e.g., T1078 Valid Accounts, T1059.001 PowerShell). Once your rules are tagged, Sentinel’s MITRE ATT&CK workbook shows you visually which parts of the attack lifecycle you actually have detection coverage for — and which are blind spots.
Step 1: Open the MITRE ATT&CK Workbook
In Sentinel: Threat Management → MITRE ATT&CK (Preview). This renders the full ATT&CK matrix with color coding based on:
- Techniques covered by active analytics rules
- Techniques covered only by available/template rules you haven’t enabled
- Techniques with no coverage at all
Step 2: Read the Gaps Honestly
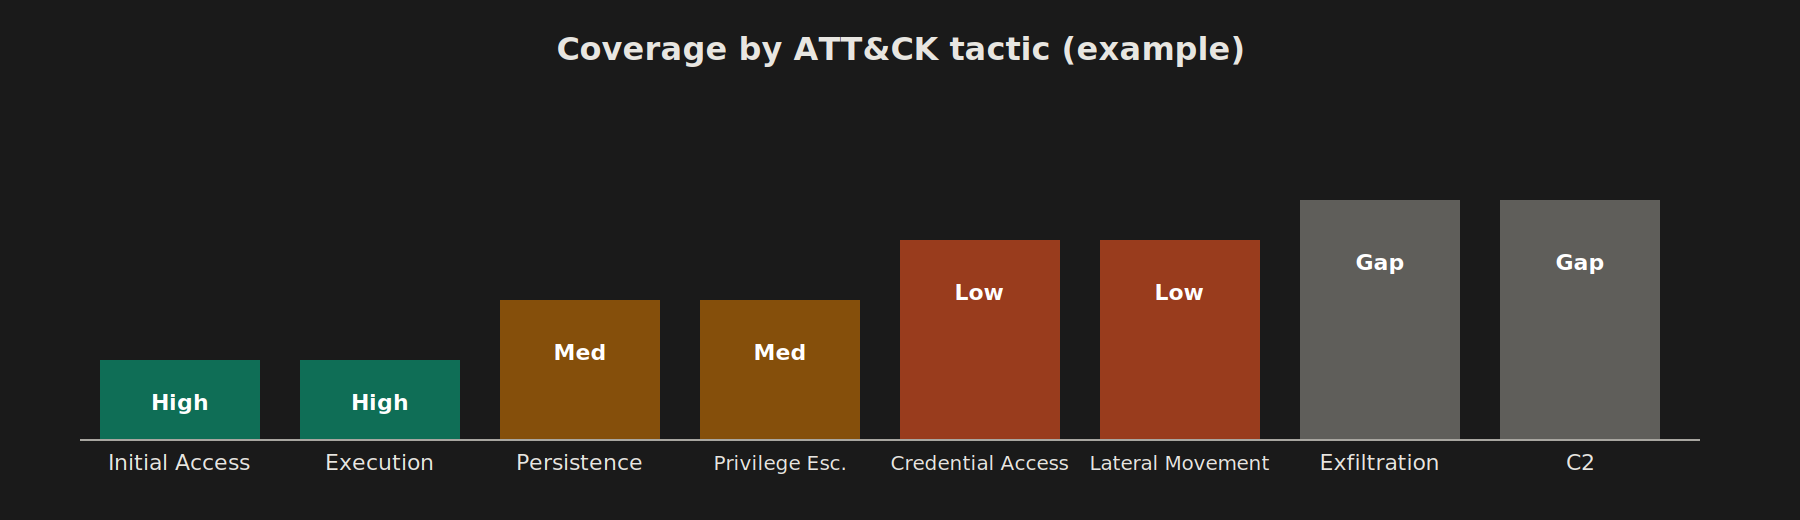
It’s common to find heavy coverage in Initial Access and Execution (because sign-in and process telemetry is easy to get) and almost nothing in Exfiltration, Command and Control, or Impact — because those require more deliberate detection engineering (DNS tunneling, unusual data transfer volumes, etc.).
For a multi-client environment (banking, government, MNC), prioritize gaps based on each client’s actual threat model:
- Banking clients — prioritize Credential Access, Lateral Movement, Exfiltration (financial data theft, fraud)
- Government clients — prioritize Initial Access, Persistence, Command and Control (espionage-style intrusions)
- MNC/retail clients — prioritize Impact (ransomware) and Collection
Step 3: Tag Existing Rules Properly
Go through your active analytics rules and confirm each has accurate tactic/technique tags. It’s common to find rules created early on with no tags at all — these won’t show up in the workbook and will make your coverage look worse than it is.
Step 4: Build a Rule Against a Specific Technique
Example — closing a gap in T1098: Account Manipulation (e.g., detecting when a user is added to a privileged role):
AuditLogs
| where OperationName == "Add member to role"
| extend TargetRole = tostring(TargetResources[0].modifiedProperties[1].newValue)
| where TargetRole has_any ("Global Administrator", "Privileged Role Administrator", "Security Administrator")
| project TimeGenerated, InitiatedBy = tostring(InitiatedBy.user.userPrincipalName), TargetRole, TargetResources
When creating the rule, tag it explicitly: Tactic: Persistence / Privilege Escalation, Technique: T1098.003 – Additional Cloud Roles.
Step 5: Prioritize Using a Simple Scoring Model
For each uncovered technique, score:
| Factor | Weight |
|---|---|
| Likelihood for your client base (banking/gov/MNC threat actors) | High |
| Data source already available in Sentinel | High |
| Effort to build the detection | Medium |
| False-positive risk | Medium |
Techniques that are high-likelihood, low-effort, and already have data connected are your quick wins — tackle those before chasing exotic techniques your threat model doesn’t really justify.
Step 6: Revisit Quarterly
ATT&CK itself evolves (new sub-techniques get added), and your rule set will drift as analysts tune or disable noisy rules. Set a recurring review — quarterly is reasonable — to re-run the workbook and check for regressions in coverage.
Why This Matters Beyond the Dashboard
For compliance-driven clients (banking, government), being able to show “we have documented detection coverage mapped to a recognized framework” is a real audit and due-diligence asset — not just a SOC nicety. Keep a simple coverage summary you can hand to a client or auditor: tactic, technique, rule name, and status.
Related Reading
Once you’ve identified a gap and want to build the detection itself, see Building Your First Sentinel Analytics Rule: From KQL to Incident for the full rule-creation walkthrough.